I have a four part series on how to sew this cute felt chicken on my YouTube Channel so for detailed video instructions please visit my YouTube channel, or click on the videos below. The pattern for Prudence the chicken can be found in the Etsy shop LittleSoftieShoppe The felt chicken is EASY to sew and is a great beginner project and can be made in a couple of hours. Happy sewing!
Today while outside I found what I believe to be Fairy footprints in the snow. I documented the find on video, so if you want to see more please watch the VIDEO Please leave a comment on what you think of the evidence I found.
This fairy planner charm is so fun to make! The fairy digi I used is from EricraftShop on Etsy. I used shrink film and Prisma colored pencils that are available in my Amazon Store Watch the video on my YouTube if you want to see a start to finish tutorial.
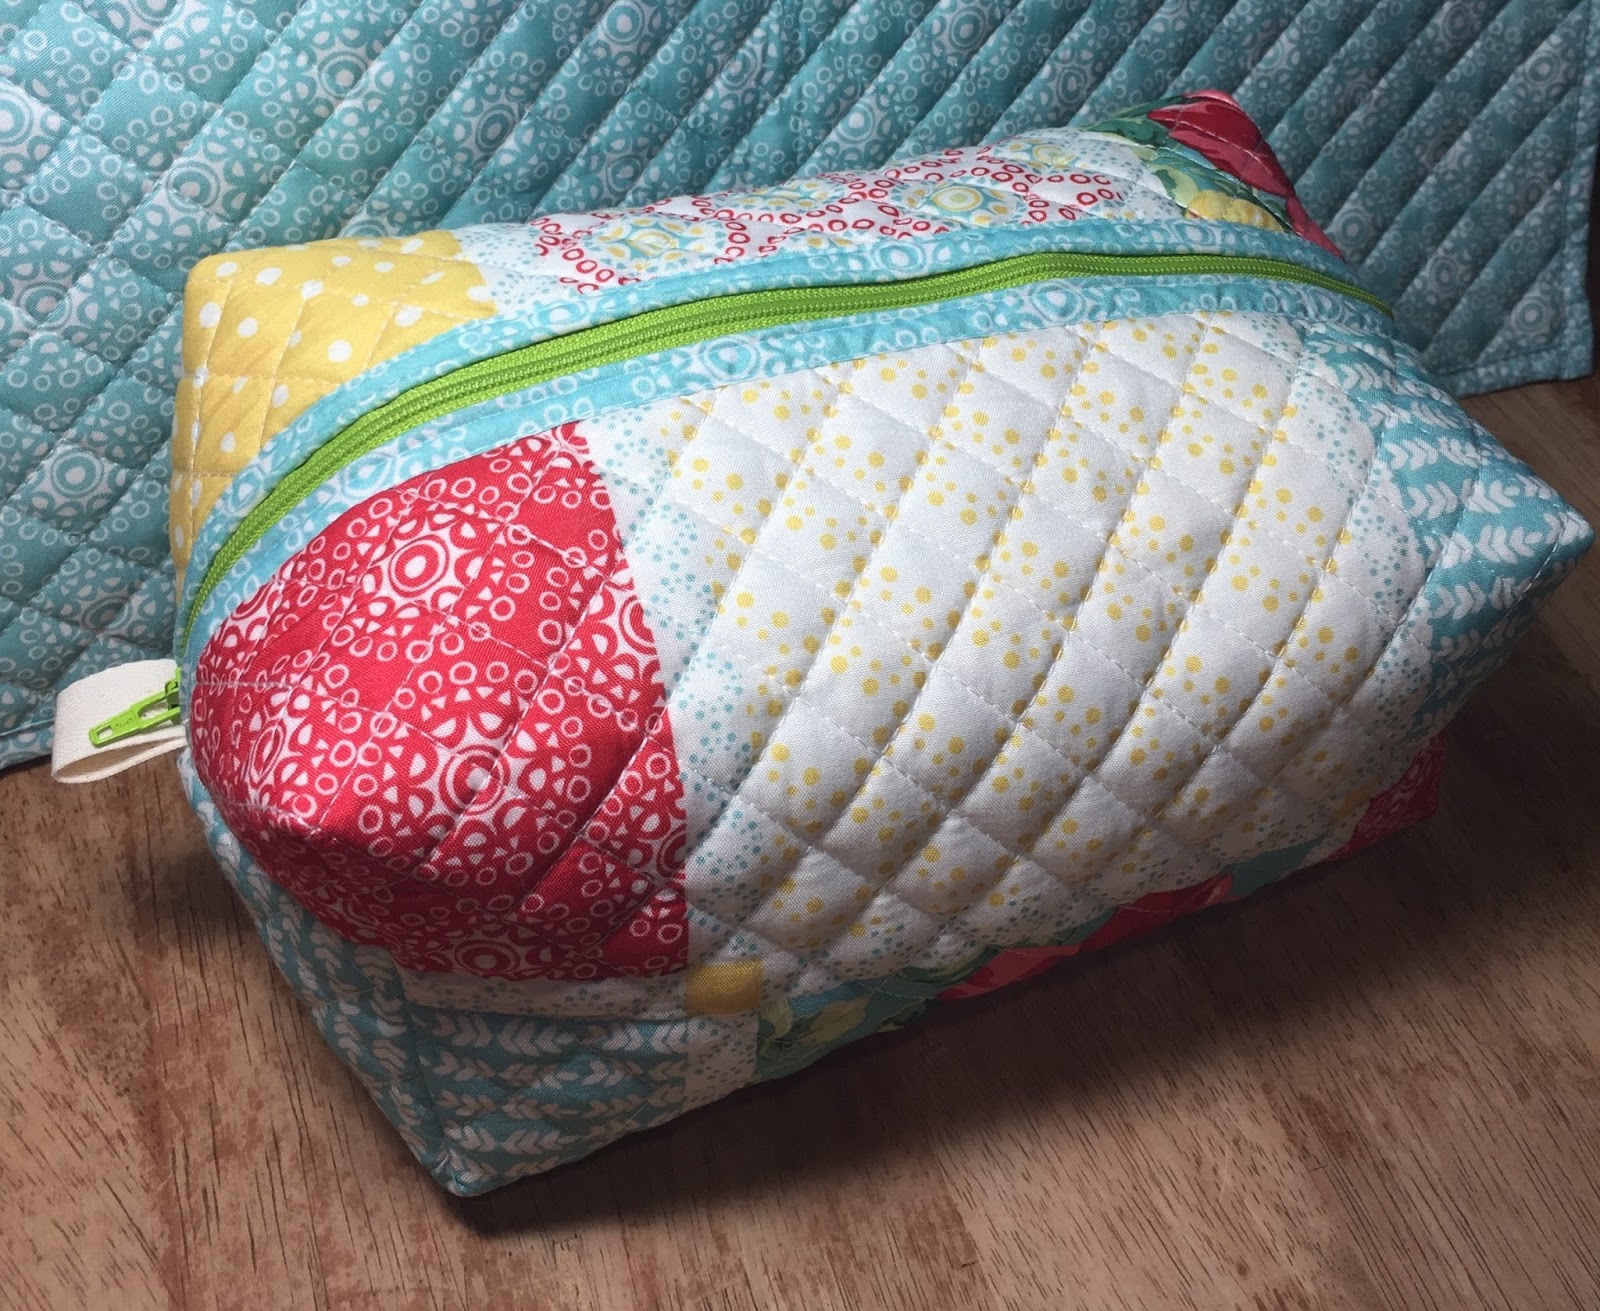
This is a great beginner sewing project! Anyone can whip this zippered bag up. It's made from a quilted placemat and only takes minutes to make. For a video tutorial go HERE Have a FANTASTIC weekend!
Welcome to the to the GIU (growing in unity) blog hop! For a chance to win a Unity prize package (there will be TWO lucky winners) please visit and comment on everyone's blog that is participating in the blog hop and don't forget the Unity Stamp Co. blog. The blog list is at the bottom of this post. For my project I chose to make a Christmas card using Aw Shucks Lulu It is a simple layered A2 sized CAS card. I colored the Lulu image with a variety on alcohol markers and used dies to cut out the layers. For an in depth tutorial please click HERE to watch my YouTube video. Happy hopping BLOG HOP PARTICIPANTS Denise Sayers Lori Simonson YOU ARE HERE Shannon Edwards Amber Sheaves Kim Chong Angela Bode MariLynn DeGroot Amanda Rhodes Paula McClane Amanda Garrett Crystal O. Minkler Unity Stamp Blog
THANKS to everyone who participated in my Growing in Unity Gal week. I have selected two Unity Stamp Co. prize package winners and they are Heather Clay and Debbie Vignola. Please contact me with your mailing info. Have a great week everyone.
Crochet Santa face tutorial instructions This written pattern is really a companion to my video and work/make more sense in conjunction to my tutorial video which can be found HERE The pattern is in my head so I don't have a written pattern, I learned how to crochet these over 20 yrs ago from my grandma. FACE Magic ring then chain 3, 12 DC in magic ring, total of 13. Close magic ring then in top of chain 3 insert hook and finish off work. BEARD/HAIR Join white yarn in any stitch, chain 3, DC in same space as chain 3, 2 DC in each stitch a round, total of 26 DC including the ch3, finish off in top of the ch 3 stitch. HAT red yarn. join in any stitch, ch 3, dc in next 3 stitches, total of 4 dc. 2 dc in next stitch, 2 dc in next stitch, dc in next 4 stitches, total of 12 stitches. ch one turn your work, decrease by inserting hook into ch one space pull up a loop, then insert hook into next space pull up a loop then pull through all 3 stiches on hook, single crochet in next eight stitches, decrease by inserting hook in next stitch pull up a loop, insert hook into top of ch 3 stitch pull up a loop then pull through all 3 loops, ch one turn work, decrease by inserting hook into nextstitch pull up a loop, insert hook into next stitch pull up a loop then pull through all 3 loops, sc in next 8 stitches, single crochet 3 stiches down the post with last sc going into the stitch where red and white yarn meet(see video at 9:36), ch 3, turn your work, sc in next 2 chains, 12 sc across, slip stitch 3 times down post, skip a stitch and the last slip stitch going into the white of beard (see video at 11:41), finish off work. 1st ROW BEARD white yarn, join yarn in white dc near the hat(right side of your work should be facing you), ch 3, in third ch from hook sc, in next stitch sc, then ch 3, in 3rd ch from hook sc, in next ch sc, repeat around face total of 15 picot, to finish off sc in next stitch and then finish off. 2nd ROW BEARD start in post underneath 1st picot, ch 3, sc in 3rd ch from hook, go underneath next post sc, ch 3, sc in 3rd ch from hook, in next post sc, ch 3, sc in 3rd ch, repeat in all the posts, total of 15 picots, finish off by going underneath last post, sc then finsh off. 3rd FINAL ROW BEARD start in face post that is diagonal from 1st picot of 2nd row, go underneath face post, ch 3, sc in 3rd ch from hook, sc, next post, ch 3, sc in 3rd chain from hook, next post sc, ch 3, sc in 3rd ch from hook, next post sc, ch 3, sc in 3rd ch from hook, next post sc, ch 3, sc in 3rd ch from hook, in last post sc then finish off. Weave in yarn tails with yarn needle 4TH Moustache is basically just white yard wrapped around a couple of fingers a bunch of times. then slide off and tie in middle with a piece of yarn, leave long tails, and use those tails to tie moustache in the appropriate place.